Pages

Thursday 29 June 2017

A new technique - Mixed Media Acrylic with DecoArt Chalk Crackle.


Morning all,

I had a brilliant weekend at Dare 2 Create this weekend gone, with Andy Skinner and Tracy Weinzapfel Stratton, and the fab Tando Creative Ltd.  It has taken a couple of days to recover!  I was demonstrating on the Saturday evening, and I had some ideas floating in the grey matter, to try a crackle on the back of an acrylic piece. Bearing in mind painting on acrylic works backwards, it took some working out, and hope that it wouldn't crackle all the layers.

Here is a full tutorial, and pictures of some of the pieces I have made since.

The Acrylic has a protective layer both sides.  I remove just one side to work on, and leave the other for protection on my work surface.  Stamp an image on to the acrylic using Carbon Black Fluid Media Acrylic. You do have to be careful not to let the stamp slip, but the bonus with acrylic is that you can wipe off any mistakes while still wet. Spread the paint thinly on your craft mat to stamp with.


Choose a paint colour, and colour in behind the heart, (always on the same side as your stamping), going over the black stamping as well (this will still show through in places).


When dry, colour in the missing parts of the heart, I used Venetian gold here.  You could colour the whole heart in, some of the gold would still show through the first layer of magenta.


Cover the whole heart in a layer of black, this seals the front colours, and stops light getting through further.  It also makes the black stamping clearer from the front.


Next, splatter some slightly watered down colour all over the acrylic.  You can use one or more colours.  Dry between applications so they don't make mud!


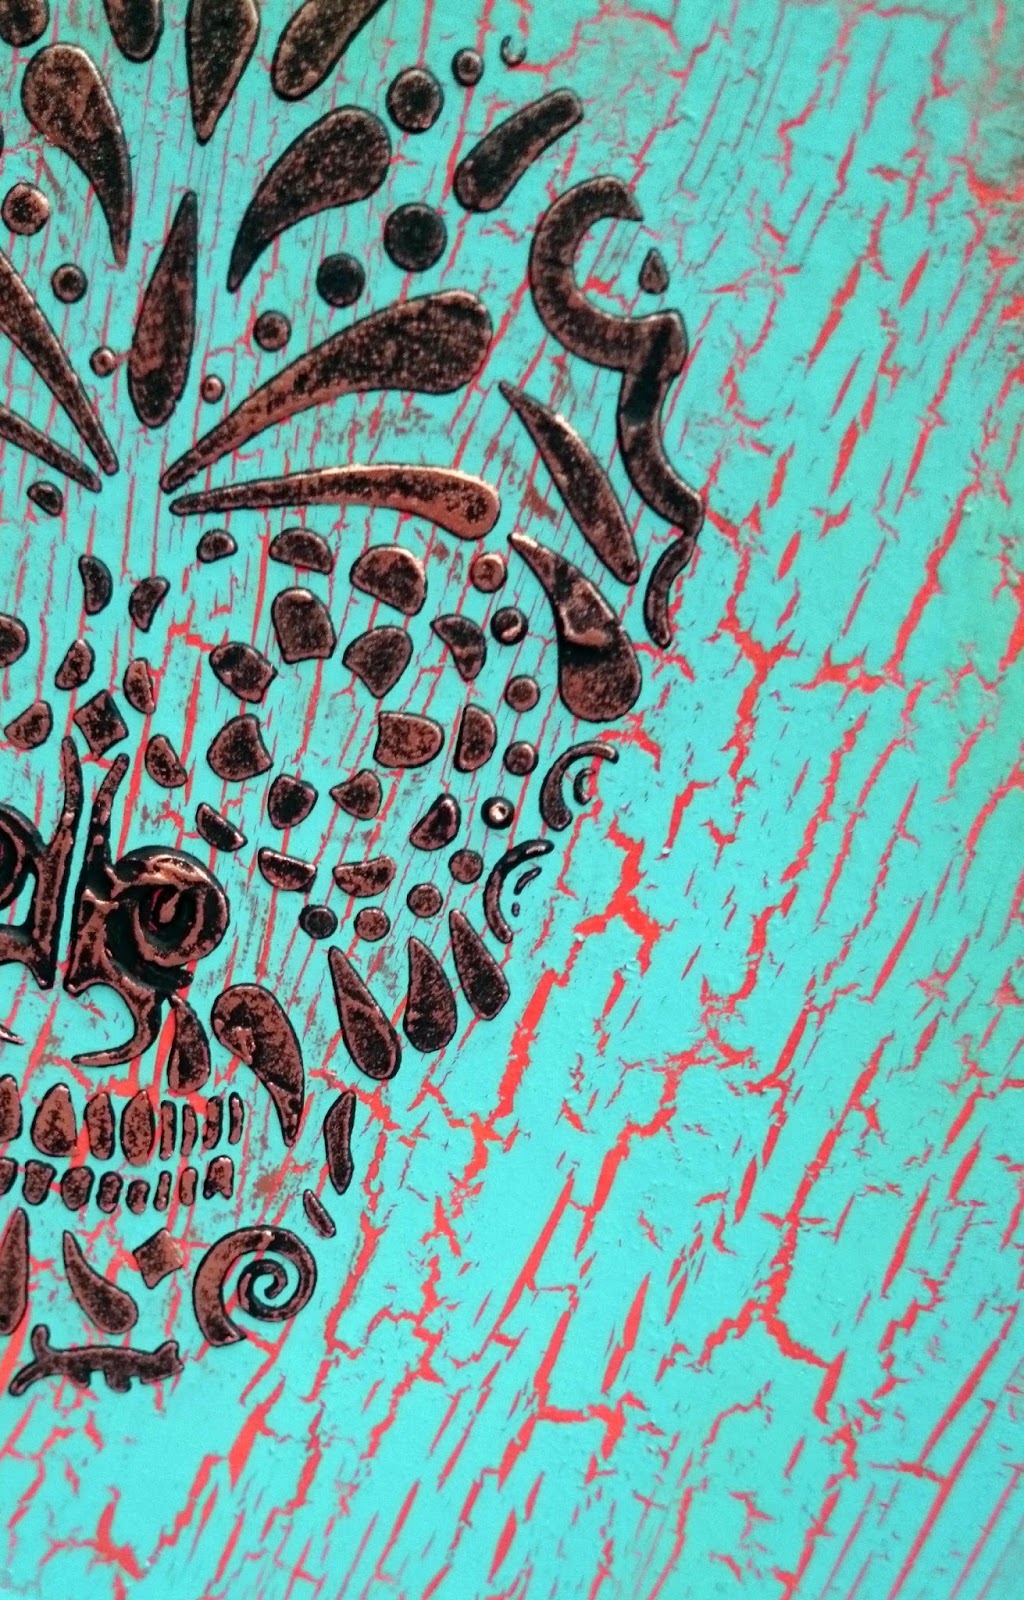
Apply the Crackle Medium to the acrylic.  I went around the edge of the heart, but you can go right over, it won't crackle normal acrylic, or what's underneath it, just what you put on top.  This crackle only works with the chalk paints.


Once completely dry, paint over with your chosen colour of chalk paint and let dry.


The final step is to paint behind the cracks in a contrasting colour.  


Then it's time for the final reveal, just peel back the acrylic from the other side and admire your artwork.


As you can see, I'm slightly hooked.  The best part is peeling away the protective cover and seeing what's beneath.

Hope it inspires you to have a go.

Best Wishes,

Nikki
xxx

Products Used:

Tando Creative Acrylic Cubbie Pieces/Media boards.
Andy Skinner/Stampendous/Laurel Burch Stamps.
DecoArt Media Fluid Acrylics.
DecoArt Chalk Crackle.
DecoArt Chalk paints.
DecoArt Dazzling Metallics.


Saturday 10 June 2017

Posting for Tando Creative today..

Morning all,


Over on the Tando Creative blog today I have a tutorial on creating a little heart sugar skull shelf.  Hope you can pop over and join me for more details.

Best Wishes,

Nikki.
xxx


Friday 9 June 2017

Eileen Hull Passport Die and a Crafty Afternoon!


Morning all,

This is just a quick post, as I never seem to share something I've made 'just for fun'.  I've had a couple of nice days this week crafting with friends, the first day I finished a project which I can't show as usual, but on the second afternoon with my friend Jan, I just sat and played.  Jan had the new Eileen Hull Passport journal die, and I am now hooked.

Now I have to admit to not using my papers much any more, or die cutting!  But I LOVED this, and now want to make ten more.  The die is out of stock nearly everywhere in the uk, so I'm just going to have to wait to get it myself, but definitely will be now!  There is also an XL journal die, and that is now on my hit list too.

I used IndigoBlu papers for the covers and a few of the pages, and the rest were old Stampin Up papers I had, but you can use any paper, card stock, or recycled paper (junk too) that you like.


The book itself was exceptionally easy to make, and to bind at the end, we used an elastic cord, and I also made a quick tie to just slip over the book, but you could add buttons and cord, wrap around, wire, anything you like to secure it.


I added two little flower beads to my cord, as I decided to use this as an allotment journal, so I can see progress (hopefully!).

I used a thick greyboard, but would suggest to use slightly thinner than I have, it makes the spine easier to work with!  You can also glue your covers inside or outside your spine, it is personal choice.  You can also bind it in any way you like, I chose to go across the two holes as Jan's looked so neat I followed suit.


I will add a title, and maybe a little embellishment, and of course fill it full of allotment pics, so maybe will post an update later in the year.

Happy Crafting,

Nikki
xxx